Most “my printer is broken” calls we get on 0800 INKINK are a dried print head, not a dead printer. In about eight cases out of ten you can fix it yourself — twenty minutes for a light clog, overnight for a stubborn one. But the right method depends on where your print head lives, and getting that wrong is how people turn a $20 problem into a $300 one.
First, find out what kind of printer you have
This is the single most important thing on this page, and almost no guide mentions it.
| Print head location | Brands / models | What this means for you |
|---|---|---|
| Fixed inside the printer | All Epson, all Brother, HP OfficeJet Pro, HP Smart Tank | Cleaning has to be done in place, through the ink inlets |
| Removable | Canon MAXIFY and PIXMA G (MegaTank), some HP | The head lifts out and can be soaked properly — the most effective method there is |
| Built into the cartridge | HP 61/63/65/67, HP 302/304, Canon PG- and CL- series | Replacing the cartridge replaces the head. A soak can still revive one — worth trying before you bin it |
How to tell in ten seconds: look at your old cartridge. A copper-coloured strip or a row of tiny gold contacts on the bottom face means the print head is in the cartridge. Just a plastic box with a chip on the side means the head is in the printer.
Step 1: Print a nozzle check, not a test page
A test page tells you the printer talks to the computer. A nozzle check tells you which nozzles are blocked. People confuse these constantly.
- Brother — Ink / Maintenance → Improve Print Quality → Check Print Quality
- Epson — Printer Settings → Maintenance → Print Head Nozzle Check
- Canon — Setup → Maintenance → Nozzle Check
- HP — Tools → Print Quality Report
Photograph the result. You will want to compare after each attempt, and “it looks a bit better” is not a measurement.
- Whole colour missing → that channel is fully blocked, or the cartridge is empty or not recognised
- Broken lines with gaps → partial clog. This is the one that cleans up well
- Everything faint but complete → usually not a clog. Check ink levels and paper settings first
- Colours in the wrong position → not a clog at all. You need head alignment, a different menu item
Step 2: Run the built-in cleaning — but only twice
Run it, print another nozzle check, compare with your photo. If it improved but is not perfect, run it once more. Then stop.
This is where most damage happens. Each cycle pumps ink through the head into an internal waste pad. On Epson models a counter tracks this, and when it fills the printer refuses to print until it is serviced. Ten cycles in a row can burn more ink than a full set of cartridges.
Step 3: Let it rest overnight
If two cycles did not clear it, the blockage is dried pigment. Force will not move it — time will.
- Run one cleaning cycle
- Turn the printer off using its own power button, not the wall switch
- Leave it 8–12 hours
- Turn it on and run a nozzle check
Why the printer’s own button matters: shutting down properly parks the head on its rubber capping station, which seals it against air. Killing the power at the wall leaves the head exposed to dry out further overnight — which is how an occasional clog becomes a permanent one.
Step 4: Clean the head directly
Still blocked? This is the last thing to try at home, and done correctly it rescues a lot of printers that would otherwise be thrown out.
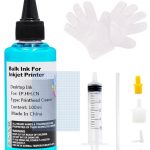
From the kitchen: a roll of paper towel. That is all “blotting paper” means here — a few folded sheets of ordinary kitchen towel is what we use ourselves.
Three rules that matter more than the technique:
- Power off, and keep it off for the whole process
- Fold paper towel under the head before you inject anything. Cleaning fluid on the circuit board is the one mistake you cannot undo
- Gently. 1–2 ml per go, pushed slowly. The nozzles are finer than a human hair — you are dissolving a blockage, not blasting it
If your head is fixed (Brother, Epson)
- Power off and remove the cartridges
- Slide a folded pad of paper towel under the head, in the middle of its track
- Fit the silicone tube to the syringe and draw up cleaning fluid
- Seat the tube over the ink inlet column on top of the head, fully covering it
- Inject 1–2 ml, slowly
- Remove the towel, mop up residue, refit the cartridges
- Run one cleaning cycle, then a nozzle check
If your head is removable (Canon MAXIFY / PIXMA G)
- Remove the cartridges, then lift out the print head
- Stand it in a shallow container of cleaning fluid — the fluid must stay below the chip contacts
- 15–30 minutes for a light clog; 3–12 hours if badly blocked
- Dry it completely, especially the contacts
- Refit, run one cleaning cycle and a nozzle check
Canon owners: pick the right nozzle
Canon heads use two inlet sizes. The white nozzle is for the PGBK pigment black channel; the yellow nozzle is for the others. Forcing the wrong one on is how inlets get damaged.
What not to do
- No isopropyl alcohol, no methylated spirits. They strip lubricant from the head and attack the adhesive holding the nozzle plate on
- No tap water. Auckland tap water leaves mineral deposits in passages measured in microns
- Nothing sharp. Not a pin, not a needle, not a paperclip
- No hard pushing. If 2 ml will not go through gently, soak it longer
Why it clogged in the first place
It sat unused. A printer used once a month will clog; the same printer used twice a week usually will not. If you print rarely, print one colour page a week — it costs a few cents and saves the head.
It is somewhere warm and dry. A printer in a sunny window or above a heat pump outlet dries faster. Move it.
It was switched off at the wall. As above — the head never gets capped.
Still stuck?
Call 0800 INKINK and talk to someone in New Zealand who deals with this every day. Tell us the printer model and what the nozzle check looks like. We would rather tell you not to buy something than sell you a cartridge that will not fix your problem.